Using a beauty dish to light portraits
Capturing the essence and beauty of a subject through portrait photography is an art that demands the perfect blend of equipment and technique. Among the crucial tools in a portrait photographer’s toolkit is the beauty dish. Crafted as a versatile lighting modifier, this tool is tailored to produce a soft and flattering illumination, bringing out the best in the subject’s features while keeping harsh shadows at bay. Join me in this guide as we delve into the effective use of this light modifier, unlocking the secrets to creating stunning portraits.
Phottix 85cm G-Capsule
What is a beauty dish?
A beauty dish is a specialized lighting modifier that resembles a shallow dish with a reflective interior. It typically consists of a metal dish and a central deflector, redirecting the light to create a soft, even illumination. It comes in various sizes, materials, and designs, allowing photographers to choose the one that best suits their needs. Alternatively, you can use a custom-made dome like the Phottix G-Capsule with a beauty dish central deflector and a diffuser.
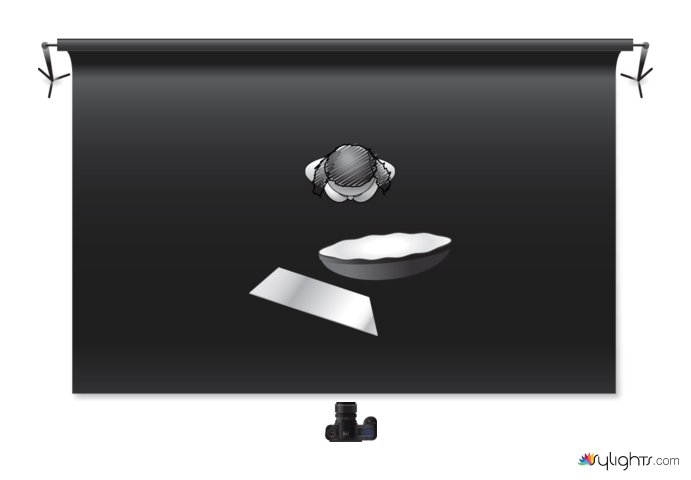
Position the beauty dish at a slight angle above your subject, and a reflector below that to reduce shadows
Setting up your beauty dish
Mounting the beauty dish
Begin by attaching the beauty dish to your strobe or studio light. Most of them will come with a mounting bracket compatible with popular lighting equipment, like the Bowens mount.
Position it at a slight angle above and in front of your subject. This placement helps create a natural-looking, flattering light that enhances facial features.
Adjust the power output
Start by checking your settings with a light meter. This should give you the optimal settings, but you can always get creative.
Experiment with different power levels to find the right balance between highlights and shadows. The goal is to achieve a soft, even light that complements your subject’s features.
Modifying the light
Some beauty dishes come with additional accessories, such as diffusers or grids, that can be used to further control the quality and direction of the light.
A diffuser softens the light, reducing harsh shadows, while a grid narrows the beam, providing more focused and dramatic lighting. Experiment with these accessories to achieve the desired effect.
Using a second reflector and creating a clamshell lighting effect is a beautiful way to capture portraits too.
Posing and composition tips
Directing your subject
Guide your subject to face the beauty dish directly for the most even lighting on their face.
Experiment with different facial expressions and poses to capture a range of emotions. The soft light from the light modifier will enhance the subtleties in your subject’s expressions.
Playing with shadows
Adjust the angle and distance of the beauty dish to create shadows that add depth and dimension to your portraits.
Consider experimenting with side lighting for a more dramatic look, while still maintaining the softness provided by the beauty dish.
Background considerations
Pay attention to the background to ensure it complements your subject. Depending on your lighting, and the distance of your subject from the background, it is quite possible that the background almost disappears. You could also add rim lighting to separate your subject from the background.
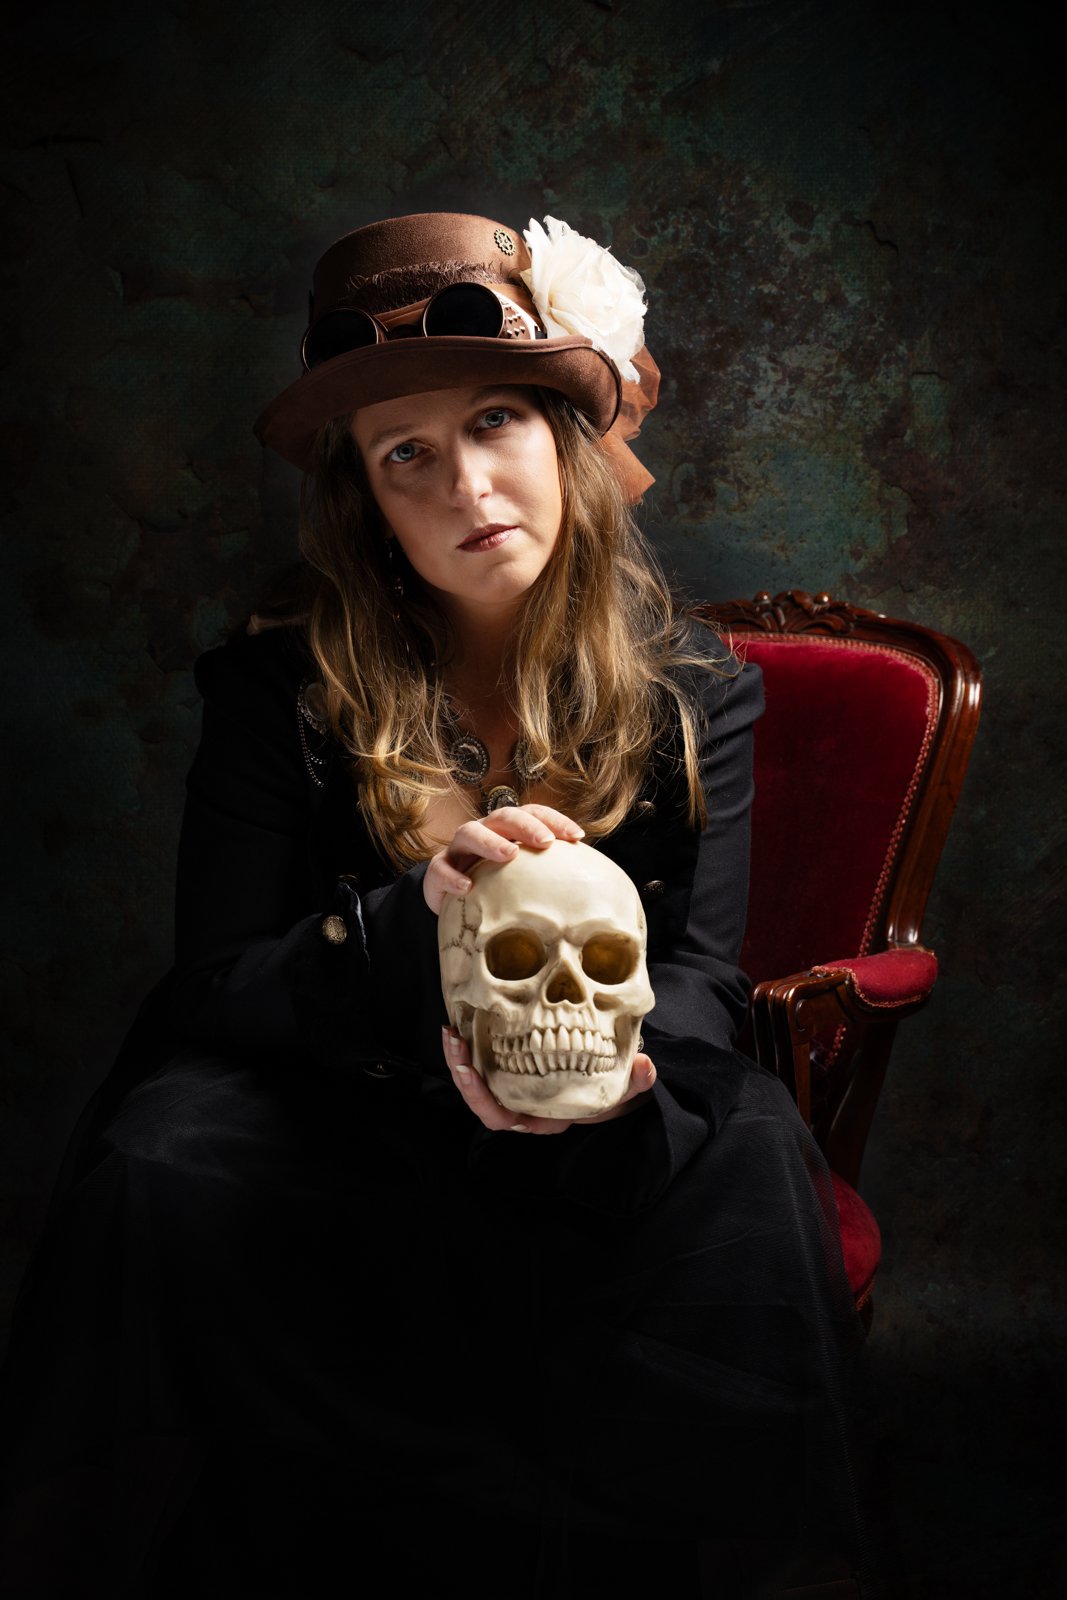
Model, Summer with a single beauty dish
Gear used:
Sony A7RV, Sony 50mm f/1.4 lens, ISO200, f/8.0, 1/125 secs
Godox AD400 Pro, 1/32 power
Using a beauty dish like the 85cm or 65cm G-Capsule from Phottix, is fast becoming my favorite way to capture stunning portraits. So, next time you are looking to capture some portraits, grab your camera and this light modifier, and create some gorgeous images for yourself.


