Focus stacking with the Sony A7RV camera
Focus stacking is a technique used in photography to achieve an extended depth of field in your images. It involves taking multiple photos of the same scene, each with a slightly different focus point, and then combining them in post-processing to create a final image with greater overall sharpness. Meanwhile, the Sony a7RV is a high-resolution mirrorless camera, which can be a great choice for focus stacking due to its excellent image quality and versatile features. It also offers in-camera focus bracketing which makes focus stacking a breeze. Focus stacking can be used for macro or landscape images too.
20-image focus stack
Here’s how you can perform focus stacking with the Sony a7RV:
Equipment and setup
Camera: Sony a7RV
Lens: A macro or a prime lens with good sharpness and minimal distortion is ideal for macro. You could use a telephoto or wide angle for landscapes.
Tripod: Use a stable tripod to ensure that the camera remains steady during the shooting process.
Remote Shutter Release: To minimize camera shake, use a remote shutter release or the camera’s built-in timer.
Setting up Focus Bracketing on the camera
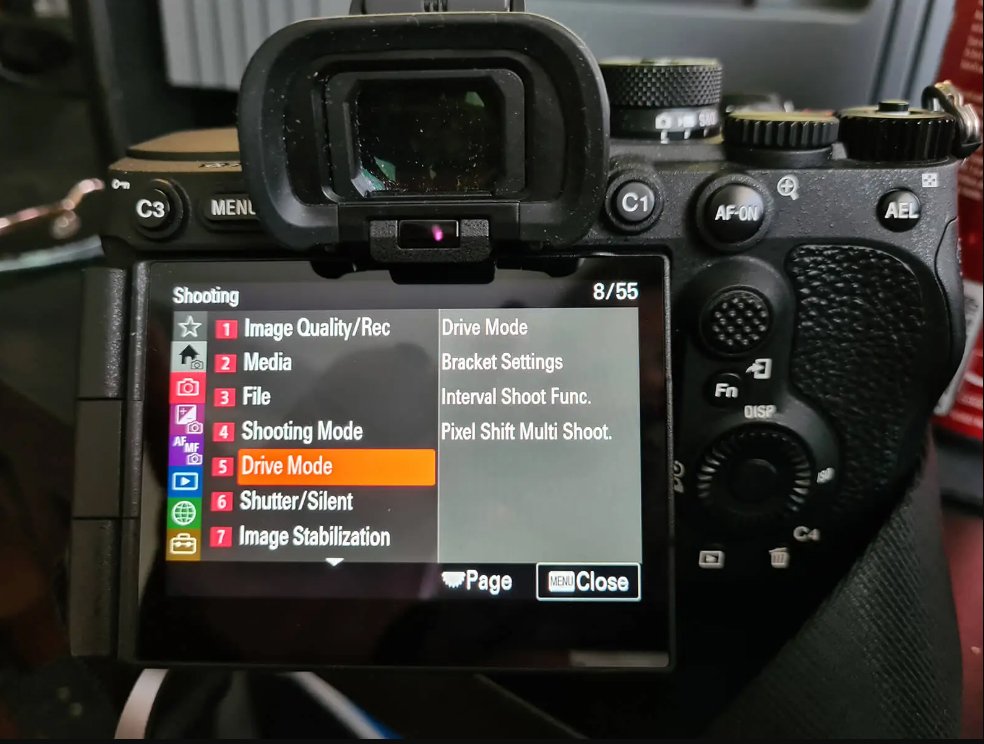
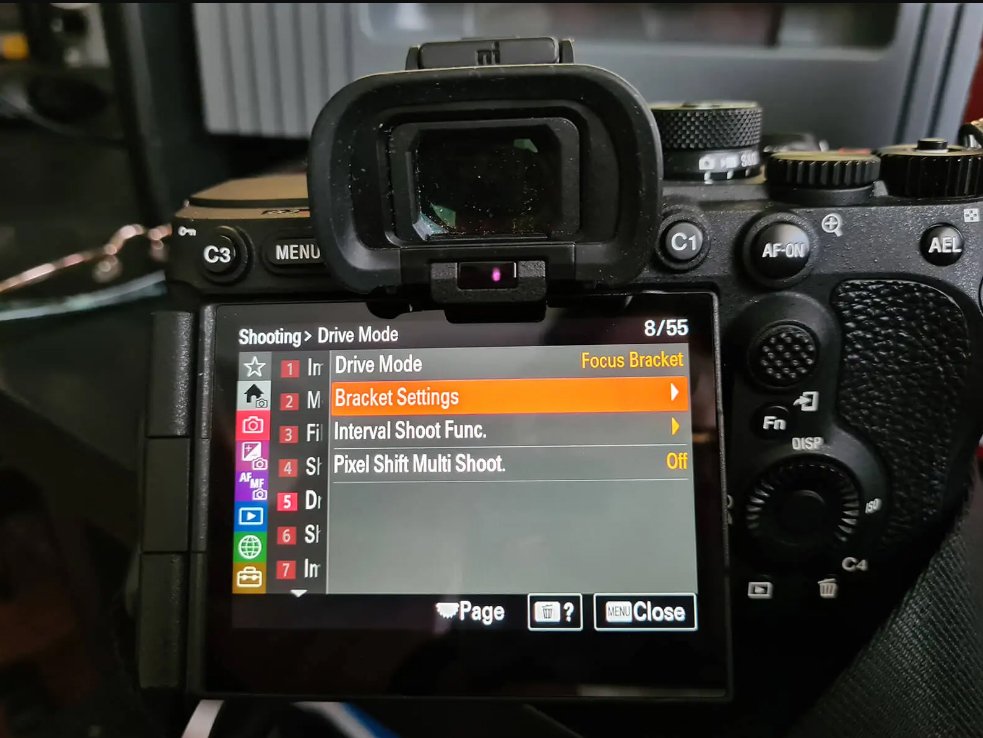
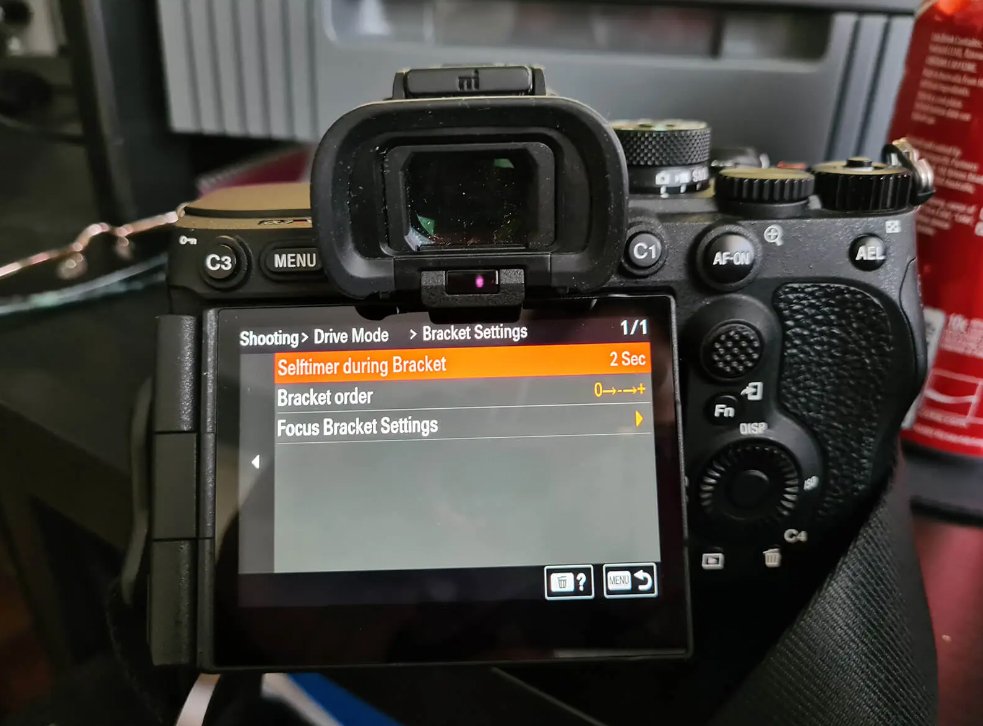
Go to Menu > Camera, Page 5 > Drive Mode > Bracket Settings > Set Desired settings
Self timer of 2 seconds is handy.
I set my bracket focus order as 0 to – + (this means it moves from the front focus point to the back)
Exposure smoothing: On
Shooting interval: Shortest
Set your camera up for desired focus bracketing.
Camera settings
Set your camera to manual (M) mode for full control or even AP mode if you prefer.
Choose an aperture that provides sufficient depth of field, typically between f/8 and f/16 (although for macro you could use f/2.8 or similar).
Select a low ISO setting (e.g., ISO 100 or 200) for optimal image quality.
Use Manual Focus mode if you wish, or Auto Focus to have precise control over the focus point. Remember to set your focus point to the closest point to the camera.
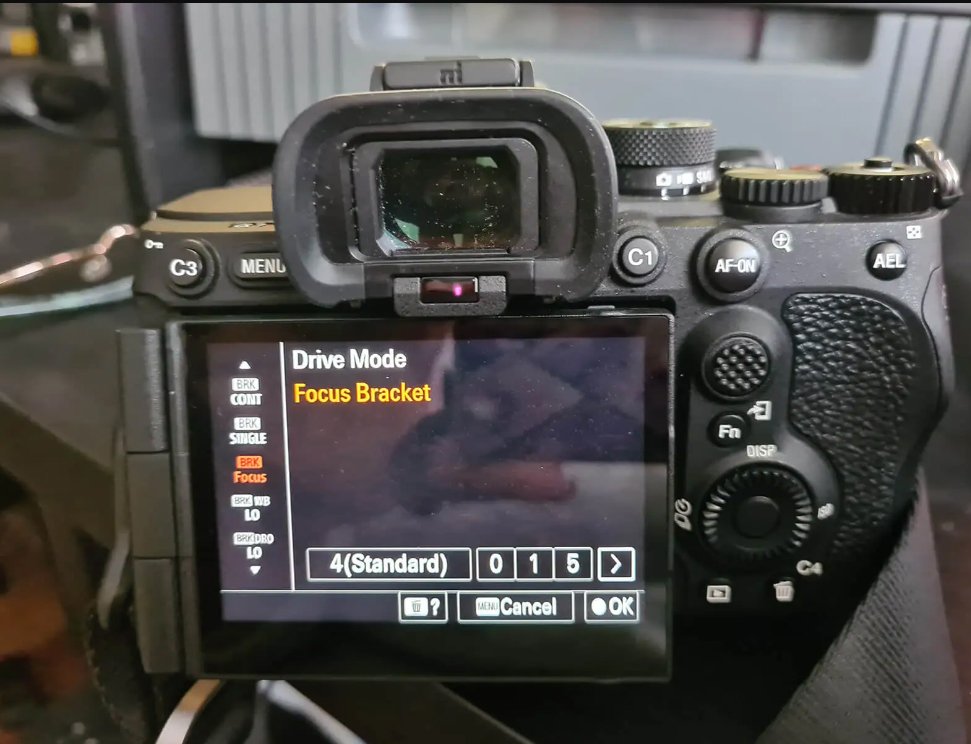
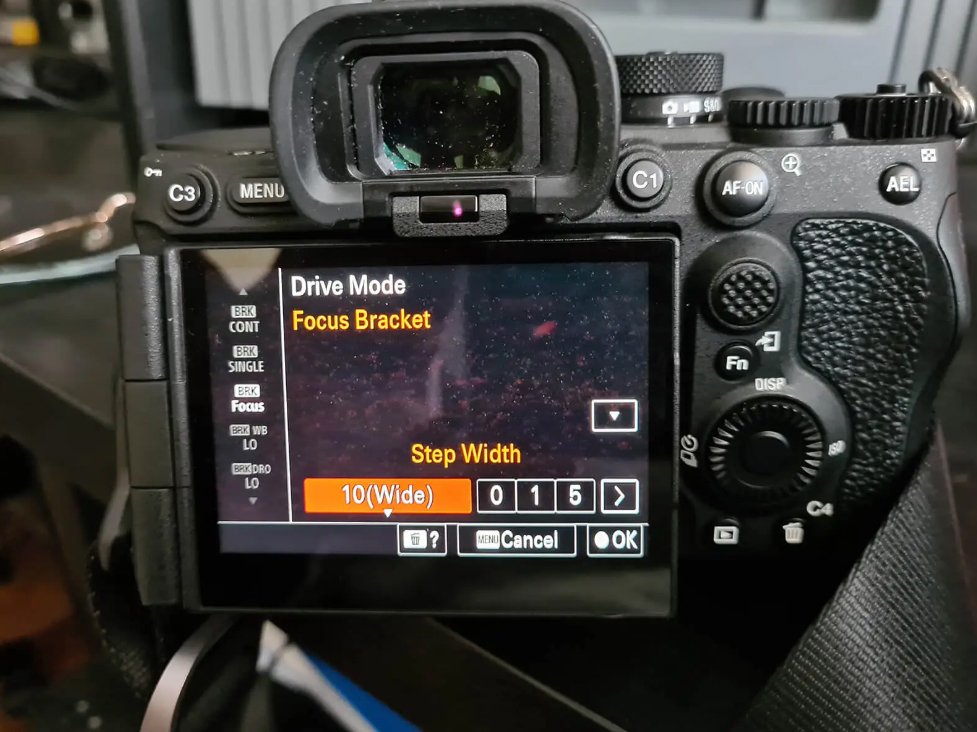
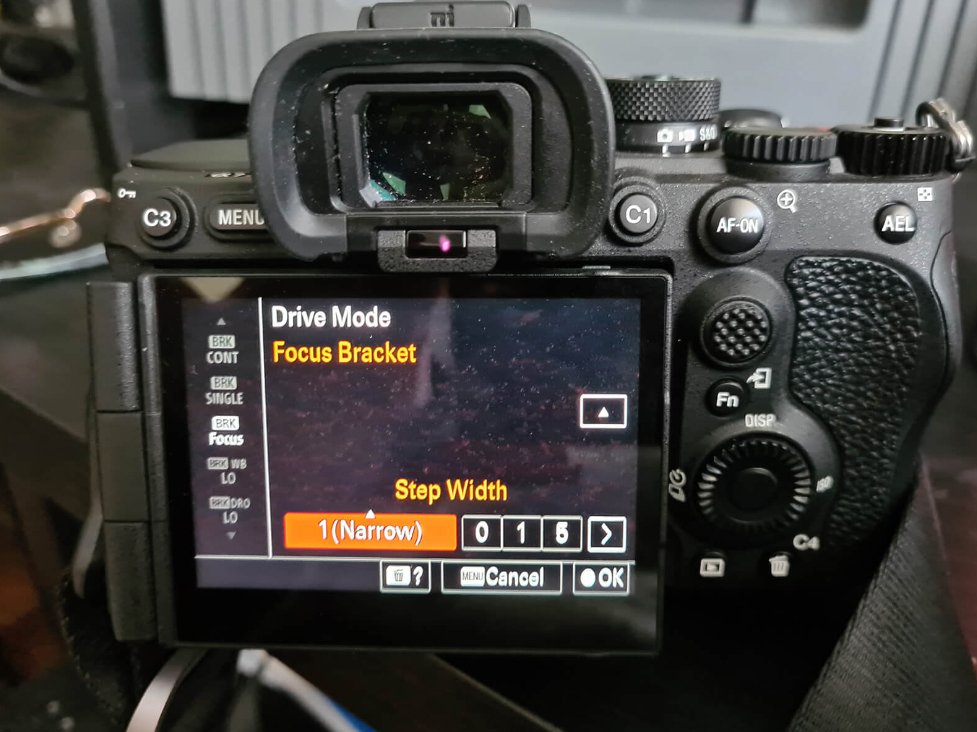
Set your camera to Focus Bracketing in the drive mode (press the Function button and select “Focus Bracketing” from the list).
As far as I can figure Narrow is for Macro, Standard for telephoto or zoom and wide is for wide.
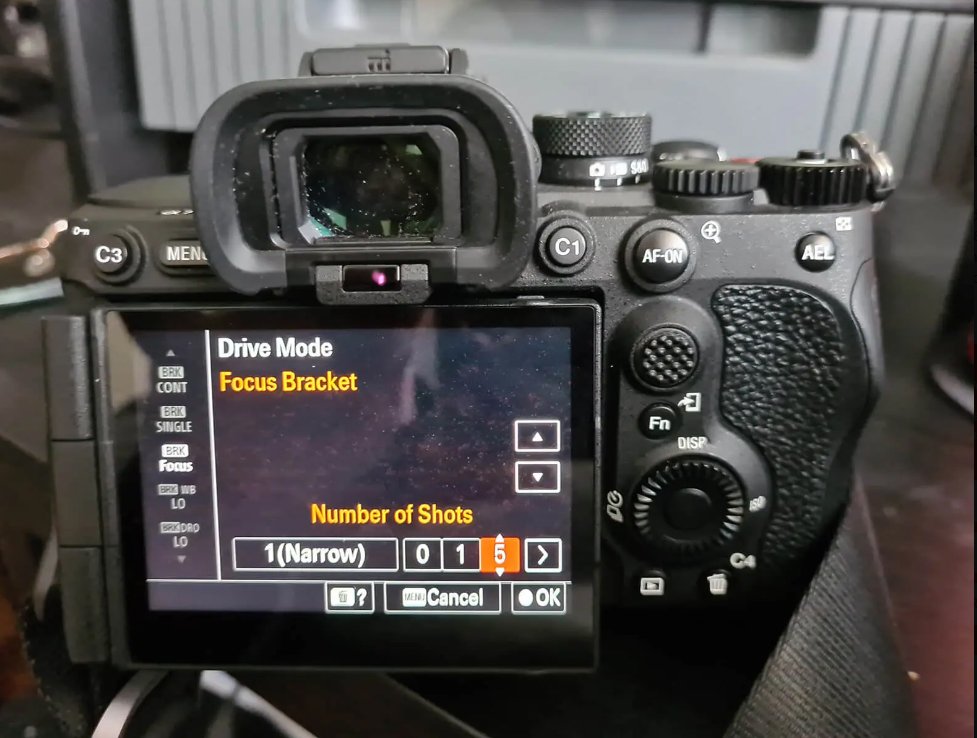
The number settings are for how many images in a single focus stack. I have read from several sources that the camera will only take as many images as required for the focus stack, regardless of what number is selected. I have found on the same subject it didn’t matter whether I selected 10, 20 or 50 it took exactly that many images. So I think setting this number might be important.
Focus Stacking process
Compose your shot and ensure that the subject or scene remains still.
Take a test shot to determine the exposure and composition.
Identify the nearest point in your composition that you want in sharp focus.
Press the shutter button and let the camera do all the work.
I took 15 images for my final edited image.
Post-processing
Transfer your images to a computer.
Use focus stacking software like Adobe Photoshop, or Helicon Focus to combine the images.
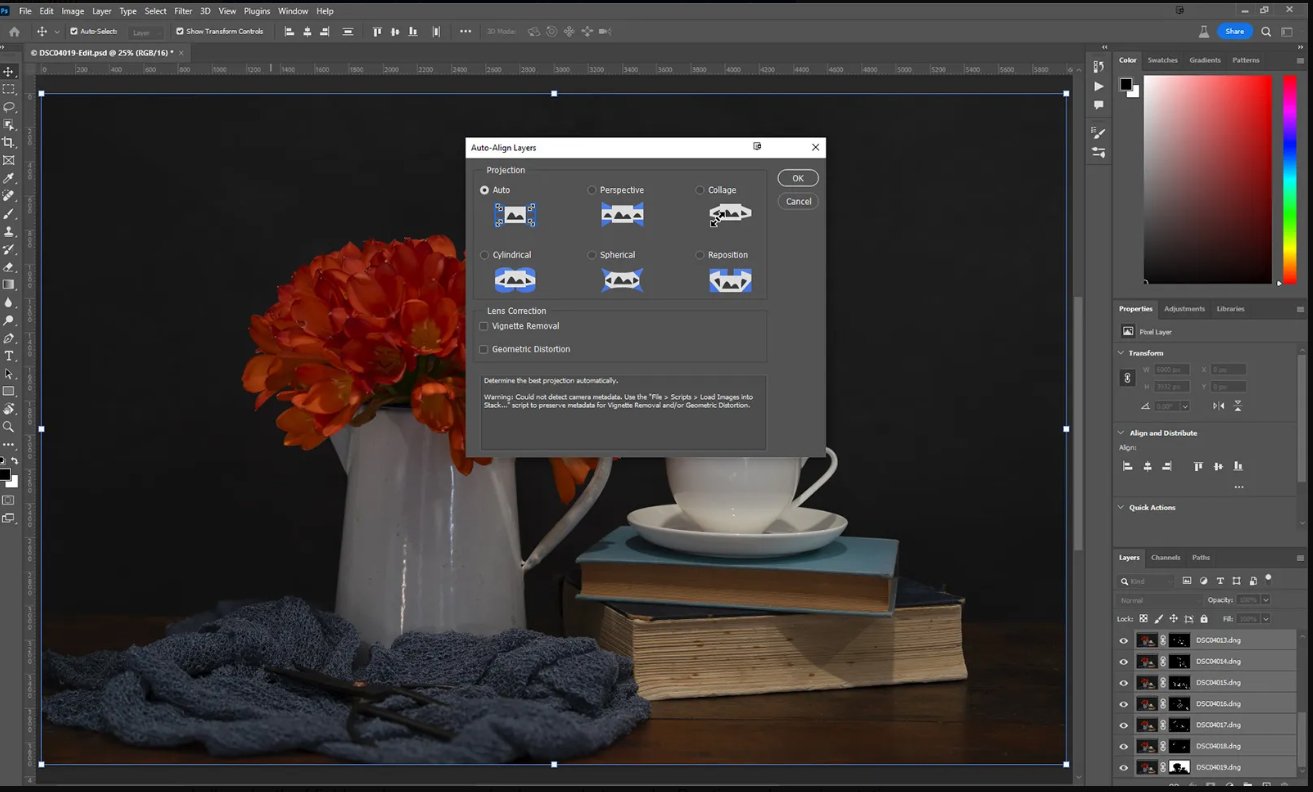
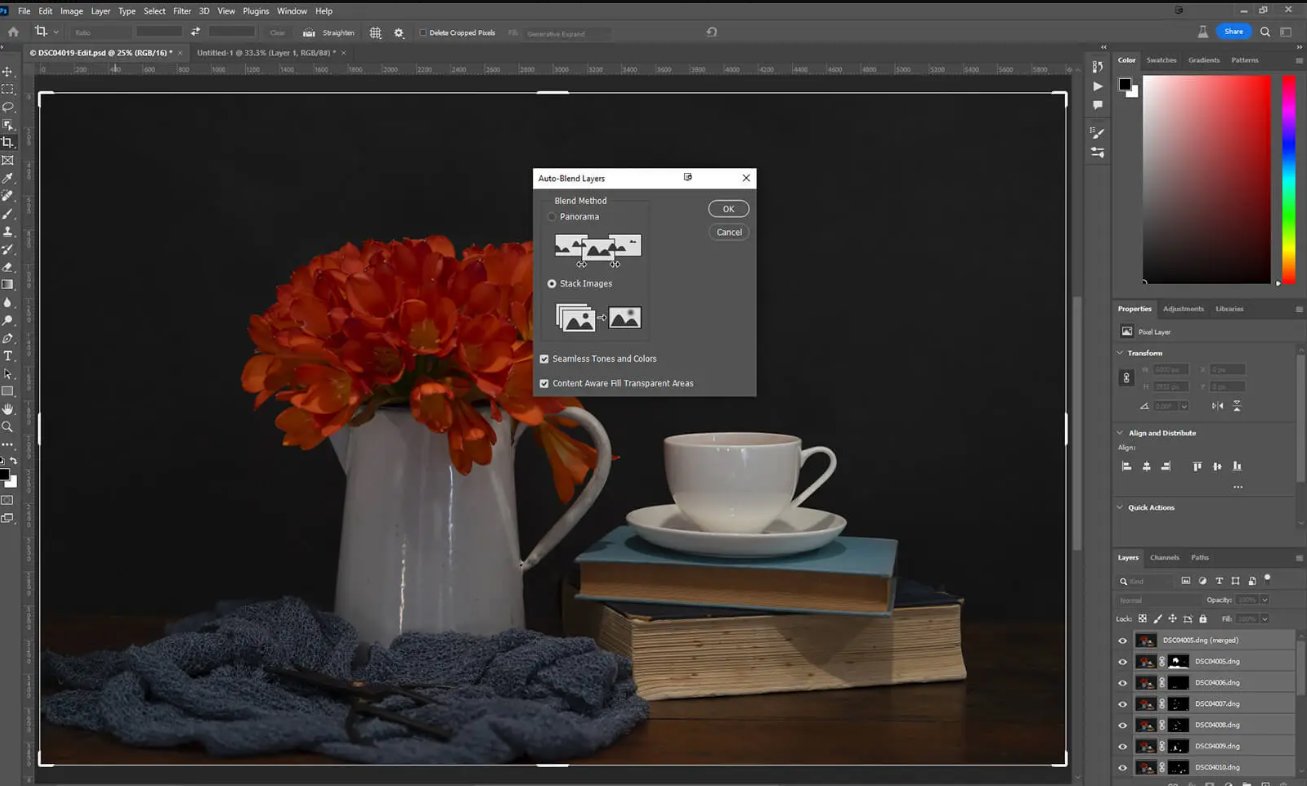
Align and stack the images in the software, which will create a final image with an extended depth of field. In Adobe Photoshop load all the images into a single file and then select each layer and go to Edit > Auto Align and then Edit > Auto Blend.
Fine-tune the stacked image if needed, and make any additional adjustments for color, contrast, and sharpness.
Save the final focus-stacked image in your preferred format (e.g., TIFF or JPEG) for sharing or printing.
Remember that focus stacking requires patience and precision, but it can result in stunning images with incredible detail. This is especially the case when photographing subjects with a shallow depth of field, such as macro or landscape photography. Practice and experimentation will help you master this technique with your Sony a7RV camera.


