Luminar Neo’s secret tools: Color Harmony
Let’s have a little look at some of the perhaps lesser-known secret tools in the new Luminar Neo, such as Colour Harmony. Luminar Neo’s Colour Harmony tool offers advanced options for colour grading or control, with various sliders for specific looks. It’s also a great tool in LuminarAI.
What is the Colour Harmony tool?
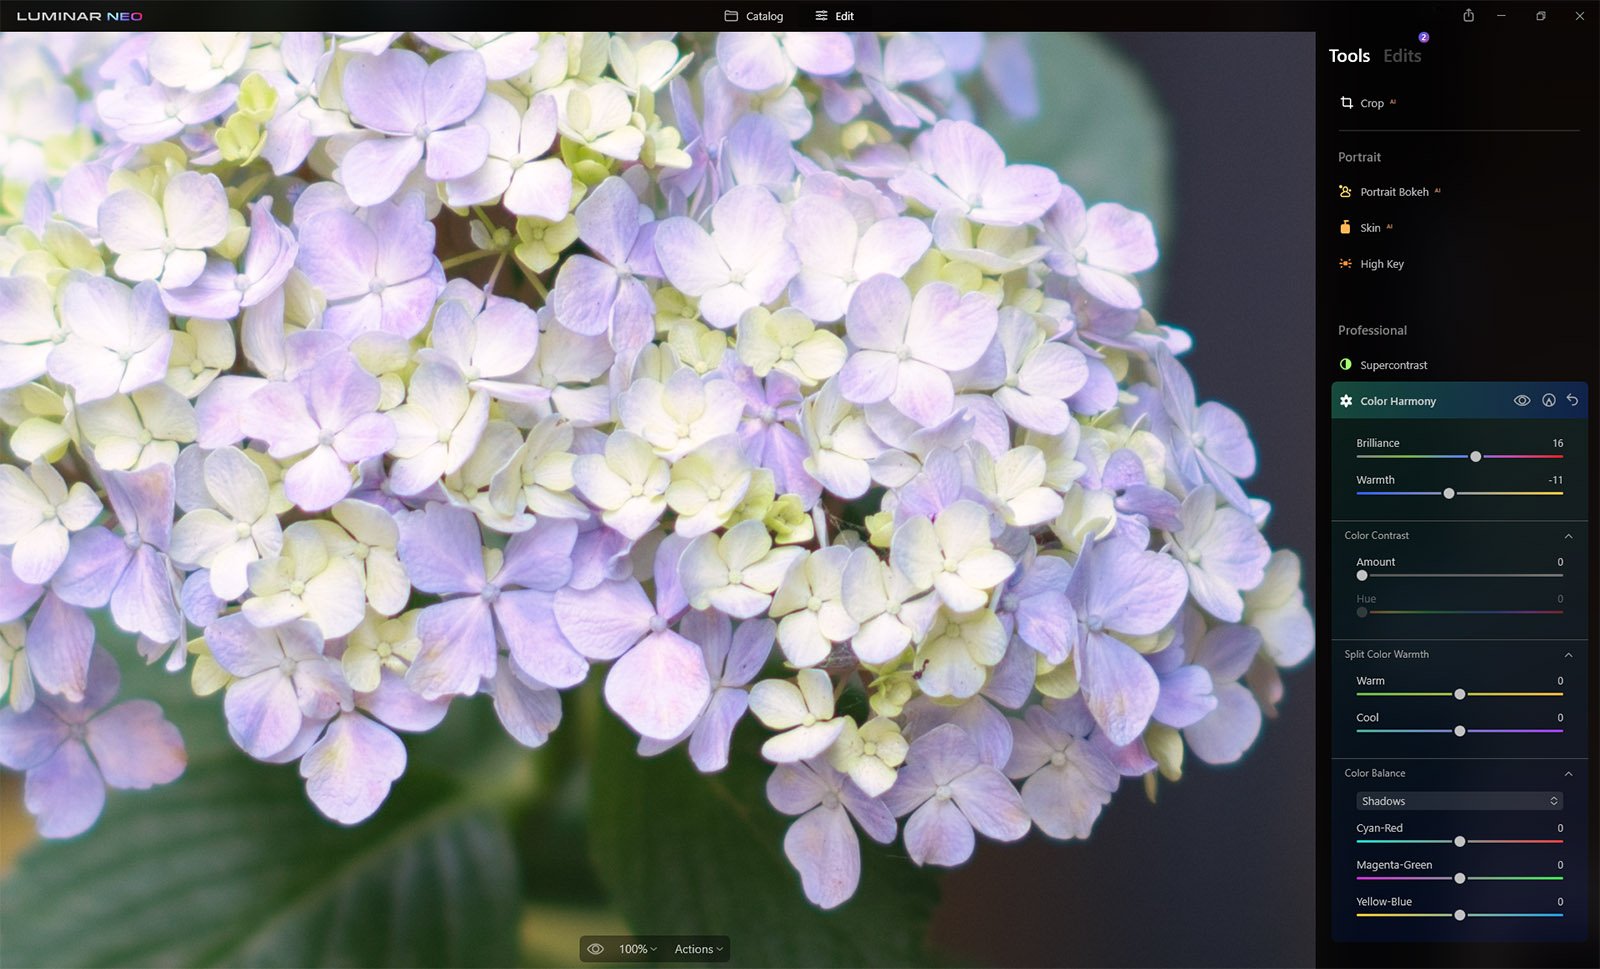
The Color Harmony tool offers several advanced options for precise colour control. It is located in the Professional tab down toward the bottom of the Edit screen.
By clicking the little arrows, you can access more sliders for Colour Contrast, Split Colour Warmth and Colour Balance. While you may not use all of them for every single image, it’s always handy to know what they all do.
The Color Harmony tool in Luminar Neo
How to use Colour Harmony
Open the Color Harmony tool within the Professional tab, each tool offers slightly different areas
Brilliance: This slider is useful for creating rich colours.
Warmth: This slider controls the colour temperature in your image. Positive offers warm values, while negative values tone that down.
Colour Contrast
This slider allows you to choose a colour range to apply contrast. Select a colour, like mauve or blue, and you can intensify the contrast of that colour.
Increase the contrast of a selected color
Split Color Warmth
This tool can be used to selectively enhance the cool and warm tones in your image. It allows you to increase color contrast and vibrancy or create creative toning effects. You can separately adjust the warm and cool colors. You can add cool and warm tones to both your highlights and shadows in your image, selectively.
Warm: Pull this slider to the left to neutralize warm tones such as yellows and reds and to the right to enhance them.
Cool: Pull this slider to the left to cool down blues, aqua, and cyan and to the right to neutralize and warm them up.
Split color warmth in Neo
Color Balance
The color balance tool is more for changing the overall mix of colors or tonal ranges in an image. You can target the shadows, highlights and mid-tones in an image. Then choose the slider for Cyan-Red, Magenta-Cyan or Yellow-Blue, for each range of tones.
Color Balance tool in Luminar Neo
The final results
A few tweaks with these sliders can make a dramatic change to your images. It need not be as dramatic as below, but knowing what each of the sliders does can make a huge difference in the color and tones of your photos. You can make everything look much warmer or cooler.


