How to fine-tune adjustments to the Background Removal tool in Luminar Neo
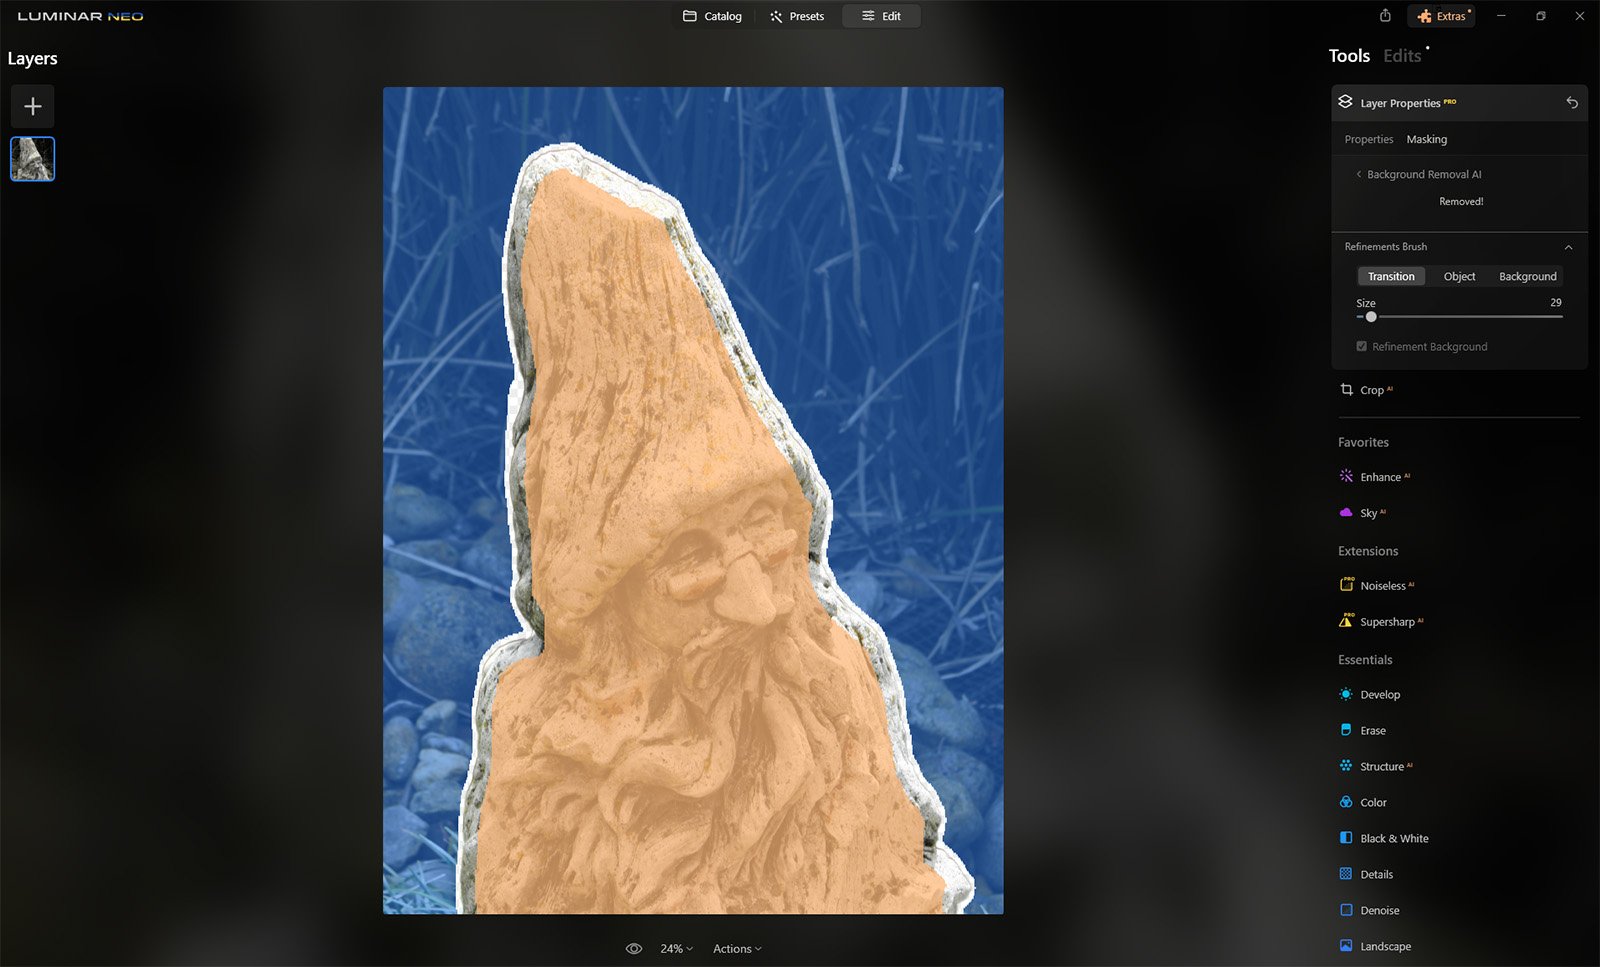
We recently posted an article (How to use the Background Removal Tool in Luminar Neo by Kris Kinsey). Let’s take it a step further and fine-tune adjustments to this tool in Luminar Neo, with the Refinements brush.
The Background Removal tool
After installing the “Background Removal tool” in Luminar Neo, head over to Layer Properties > Masking and then the Background Removal tool. This will apply a red mask to your chosen subject.
Background Removal Tool
Refinements Brush
Refinement Brush
Click the “Refinements Brush” and you can brush in additional areas, blue is the background area, orange is the object area and the transparent area is the transition between the two. You can resize the brush you use to add and remove from the mask. It helps to increase your image (zoom in) to work the various areas. Then, you can close the “Refinements Brush” to check your changes.
Replace the background
Once you have your refinements done, you can continue to remove the background and replace it with something else, as required.


